
In this blog, I will take you through the basic steps of creating your own website, spending least possible money, and how to start earning revenue from it.
And yes, honestly, I will not tell you what is a website, what is SEO and all those basic stuff, there is enough information available online on it.
So lets cut towards the action items.
Step 1. Buy a Domain
Dont run away on seeing the word ‘Buy’. If you are serious towards making a website and earn revenue from it, you have to spend a little, call it an investment !
Is it necessary to BUY a Domain ?
If you are just making a blog as a passion and want to Create a Website without spending money, you can join any of the below websites for free, however, your website will be a subdomain and not your domain. As an example, I can make www.princepatni.wordpress.com for free, but for www.princepatni.com I have to spend money.
For creating a Free Website, choose any one of these or there are many more options available online :
WordPress
Wix
Website
Ukit
BUT !
To have a strong online presence you must have your own domain. Then it becomes a serious website that means business. Even if you search for anything on google, you will not get these free websites as search results, you only get custom domains like https://princepatni.com . So if you want to get your website in the search results of Google/Yahoo/Bing, then BUY a Domain !
Where to buy Domain?
Domain can be easily purchased online via various Domain Registrar companies. Some examples in India are :
Blue Host
Host Gator
Big Rock
Hosting Raja
E WebGuru
.. and a lot more.
Simply Google search ‘buy domain’ and you will see many links (including Ads). I will suggest to check each link, check your domain availability, and compare the prices.
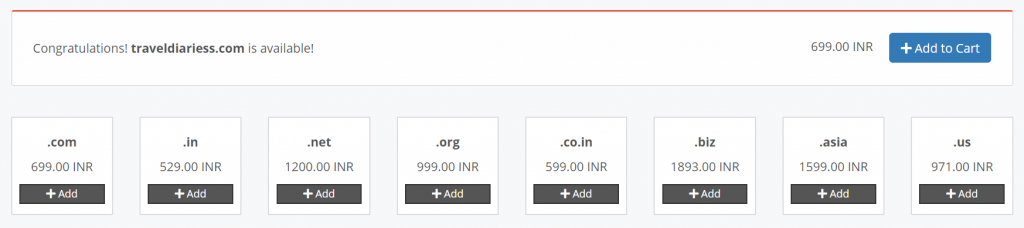
The domain you plan to buy might not be available. If its available, great ! If not, look for a name that is closer to your niche.
Example : You will not get traveldiaries.com but you can buy traveldiariess.com or a completely different name !
What is the Price of a Domain ?
A .com domain usually will cost you around 500 Rs + Taxes for one year.
You can buy cheaper domains that ends with .in or .live or .online.
Tip : Buy a domain for 3 years or 5 years for a better deal.
The price that you see can further be negotiated ! So either call up the sales team, or talk to an agent in the chat. They will give you discount codes, or offer you cheaper price and will bargain to convince you to buy the plan.
As an example : I have recently purchased a .com domain in 1200 Rs for 3 years from Hostripples. That makes it 400 Rs per year which is not bad at all !!

Step 2. Buy Hosting
Is it necessary to BUY Hosting?
I will cut short all the bull shit and say, YES !
Where to Buy Hosting ?
Like Domain, hosting can also be brought from the same Companies from where you brought Domain. Infact you can buy domain and hosting together from the same company and get a good deal. Some Examples are :
Hostripples
Host Gator
Hosting Raja
Big Rock
Dream Host
Blue Host
E WebGuru
Click any of the link above and buy the domain as per your requirement.
Buying hosting is a decision you have to make in regards to what is the need. Every hosting provider will present to you multiple offers with multiple prices that are based on parameters like : Linux or Windows Hosting, Shared or premium hosting, Amount of space, Bandwidth, No of Websites, Subdomains , Email IDs etc.
What you choose depends on what is your objective. For Example : Do you want to have a dedicated server incase you are starting a business? Or do you want to set up an e-commerce website ? Or is it a simple Blog that you want to create and do affiliate marketing.
Call up the sales guy and tell him your requirement along with the Daily visitors you expect, and they will guide you properly.
Hosting Requirements for a Simple Blog Website
For a simple blog website like this one, the cheapest plan would be of Shared Linux Hosting. Under that too, there will be multiple plans with different resource options like below :
- Web Space SSD : For long term it should be minimum 10 GB. The more the better, but more is the price too.
- Bandwidth : Can be anything from 1 GB to Unlimited, and is counted per month. It is the amount of data transfer between user and your website. As an example, my previous month Bandwidth was only 100MB, so even 1GB is sufficient.
- x Emails : No of official emails you can have. This is important for people setting up a company. For example if you create website traveldiariess.com then your main email ID will be admin@traveldiariess.com. You can create x no of such emails as a part of the plan. Usually 1 is enough.
- FTP Accounts : Basically used for large data transfer. 1 is enough.
- x Sub Domains : For example if your website is traveldiariess.com then you can create x sites like india.traveldiariess.com
- cPanel / Plesk / DirectAdmin : These are just the website data managers, all of these have user friendly interface to manage your website backend data. As per reviews, the most popular is cPanel. Plans with cPanel are costlier than plans with Plesk.
- SSL Encrypt : Incase you are planning to make an e-commerce website that involves monetary transactions, its good to have SSL Encrypt. For a simple blog site, it is not required.
- RAM : Usually it is 1GB or even 0.5 GB, it will work just fine.
So basically give a thought on your website usage and choose a plan accordingly.
What is the Price of Hosting ?
Usually on all these websites you will see so many plans with different prices, depending on above factors. The plans starts minimum from 35-40 Rs per month (for a Simple Website like this) upto 300 Rs per month (For an advanced Website like that for an e-Commerce store) or more.
Tip : Any plan that you buy is cheaper if you buy for long duration, like 3 or 5 years.
For example : I recently brought a Hosting Plan from Hosting Raja for 5 years in Rs 3000 only ! Yes, that makes it only 600 Rs per year ! That’s much less than even what we spend for our One Time meal outside 🙂
To add up and see, your yearly investment for Domain and Hosting for a simple website should be around 1000 to 1500 Rs per Year. This isn’t bad at all when we actually spend atleast 1000 Rs for watching a movie, or a fancy dinner.
Step 3 : Build Your Website
Now you have your domain, and you have a website hosting, all you have to do is login to your control panel and start building your website !
Follow the steps below.
1. Login to Hosting Provider
Moment you make the payment for hosting you will receive a confirmation mail and within minutes you will receive details of your plan along with necessary information like name servers, login credentials, etc.
Login to the hosting provider client area. Find out the link that takes you to the plan page that has the below icons, depending on your plan.
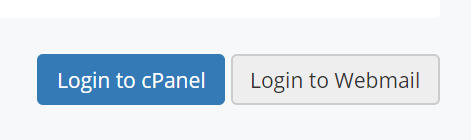
2. Login to cPAnel / Plesk / Direct Admin
After you login to cPanel you will be redirected to a page like this :
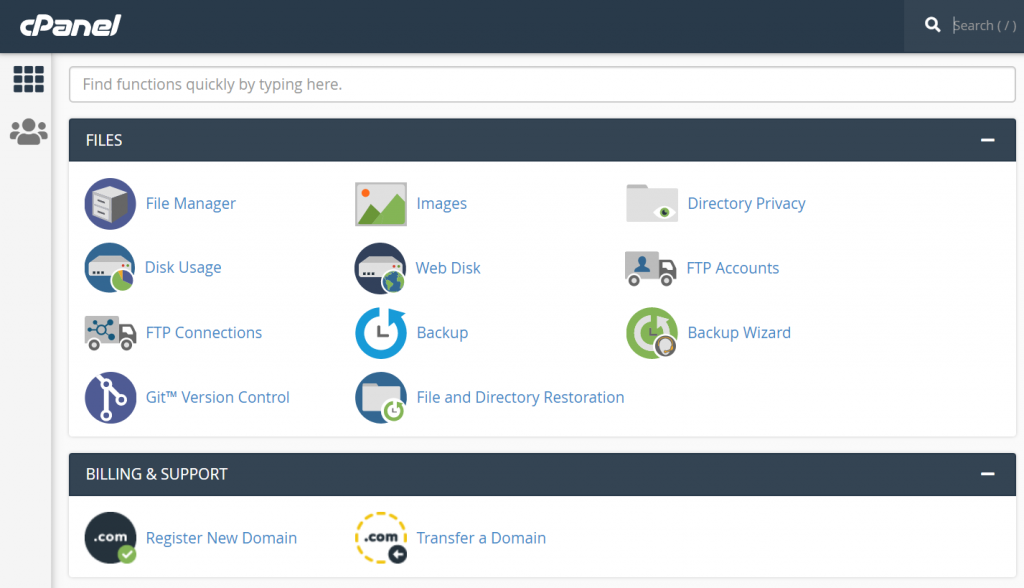
You can scroll down to see hundreds of options in cPanel. These options are all just to do one thing – manage your website and make it more awesome !
Keep scrolling till the last and reach ‘Softaculous Apps Installer. Click on WordPress under ‘Scripts’.
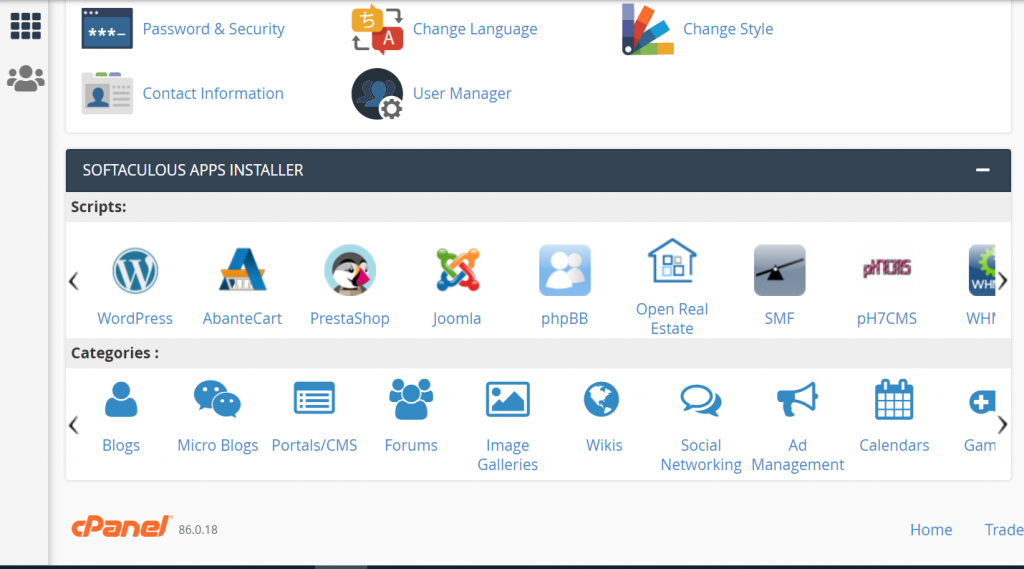
3. Install WordPress
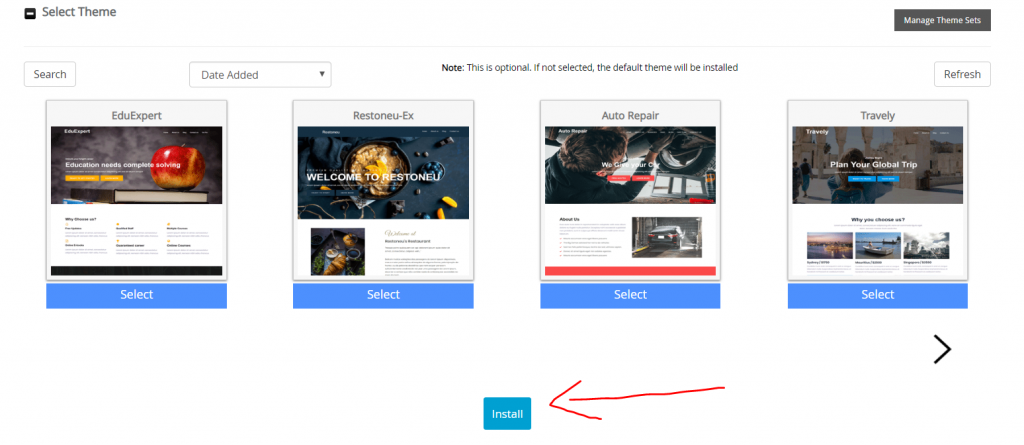
Here you reach the page where you have enormous tools to make your website. We will use WordPress. Click on Install now.
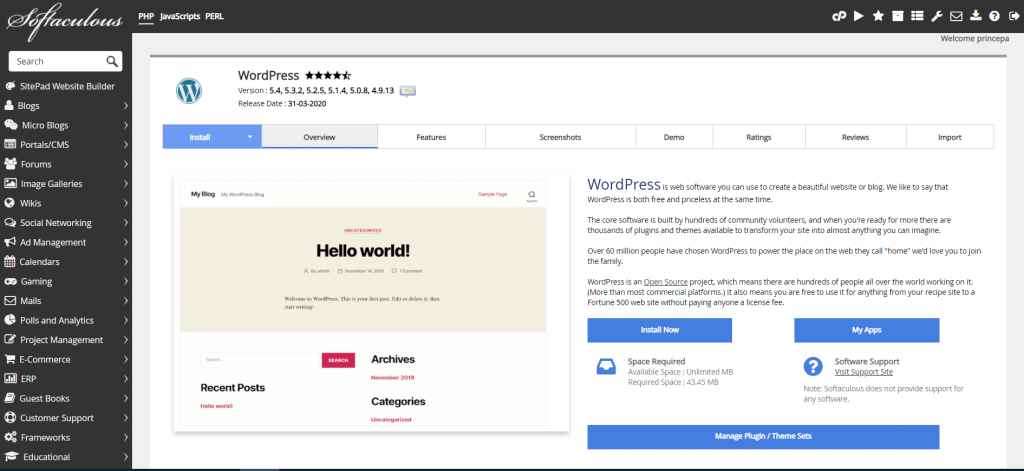
It is good to know here that WordPress is the major platform to build websites. I think over 60% websites of the world are built on WordPress. Though there are other nice options like Joomla but WordPress is the most widely used, has got the most plugins and best support.
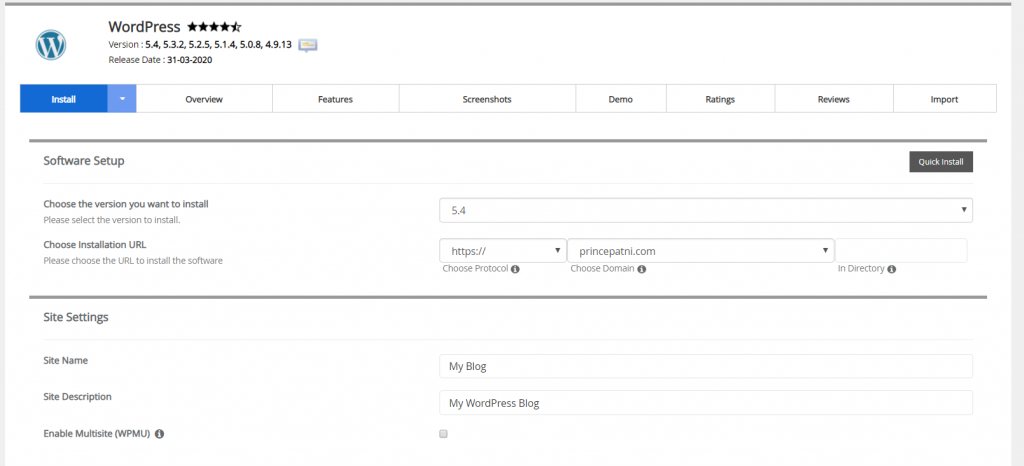
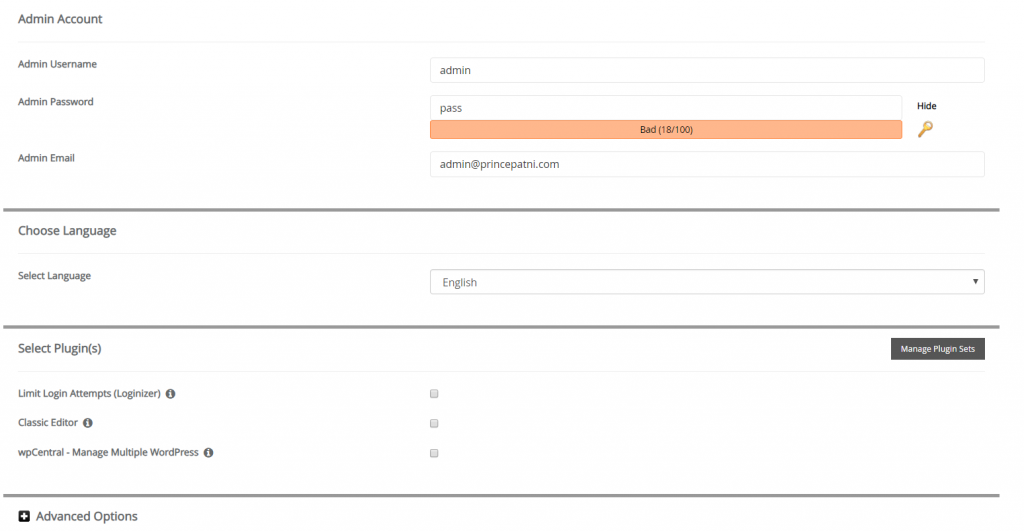
Once you click Install now, you will get a page with Details of WordPress Installation. You can keep the default ones except the password, give a strong password and click Install.
The installation takes a few minutes and then you will have it under your Current Installations :

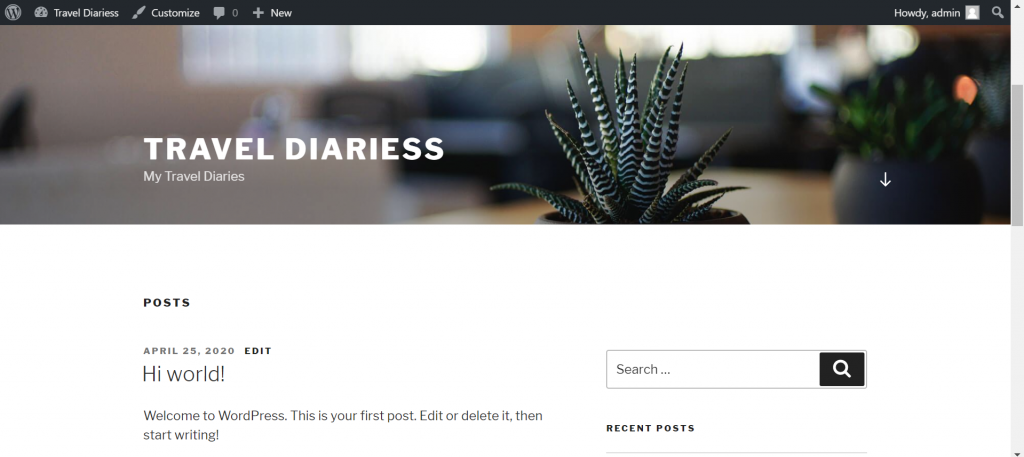
You know what, your website is ready and Live ! Congratulations !
Yes, click on the first link from above Screenshot, and you will be redirected to your website that is live and the world can see.
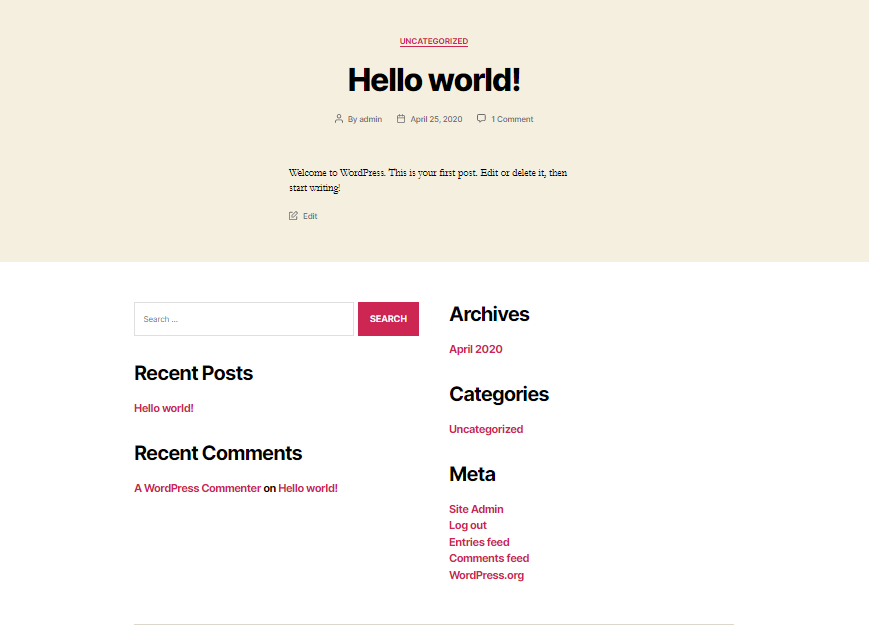
But right now its a default theme with some random content. To now put your own data, images and other things, we need to go the WordPress panel. Read on.
4. Login to the WordPress Dashboard
click on the Admin icon from above Screenshot, the image of a guy. This is what you see next :
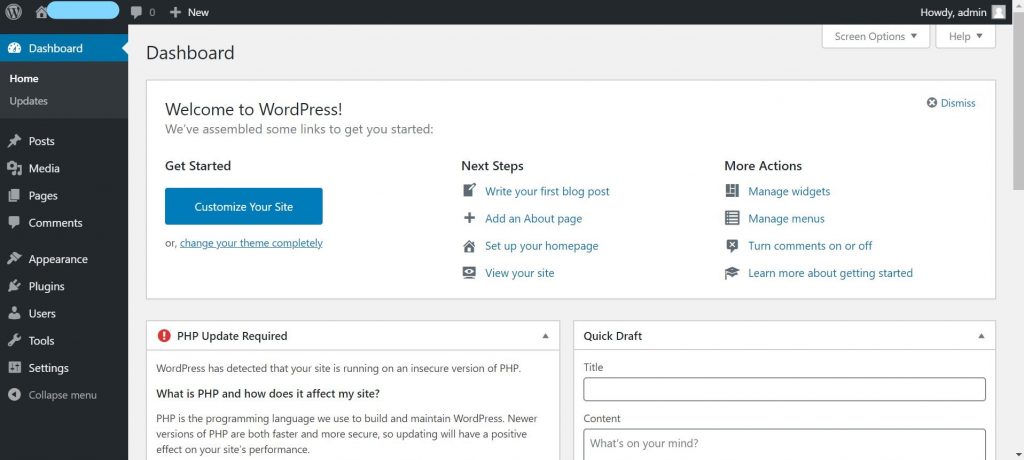
This is the main website area where you can add blog posts, home page, add media, install new plugins, change and edit themes and get a whole lot of customization options. You can bookmark this website and need not go through the whole process again, simple use this url, enter your wordpress admin username and password and start working on it.
You can search online the guide to create WordPress websites and you will get numerous tutorials. Starting from the basics to the advanced, you will be surprised to see what all you can do in this platform ! Check out this video as a beginners tutorial to use WordPress in building websites.
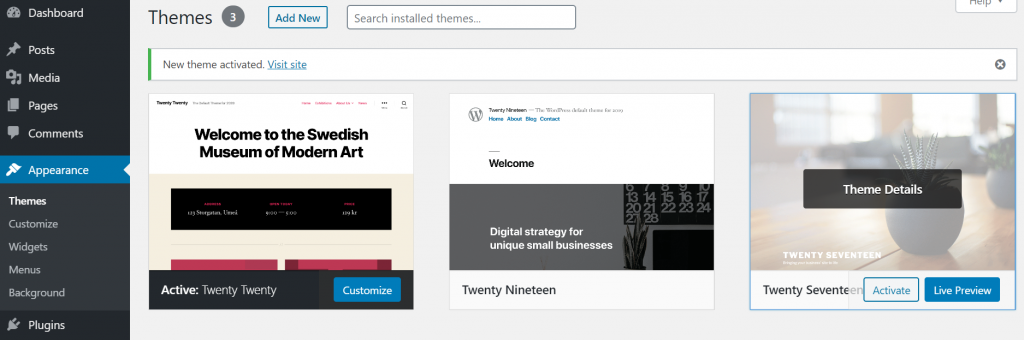
You can do advanced stuff, but creating a simple website is easy. Just take any of the themes under ‘Appearance’, put your own data and images, and publish.
You can create a static Page as your home page that should first come up when the website loads. For that change this setting :
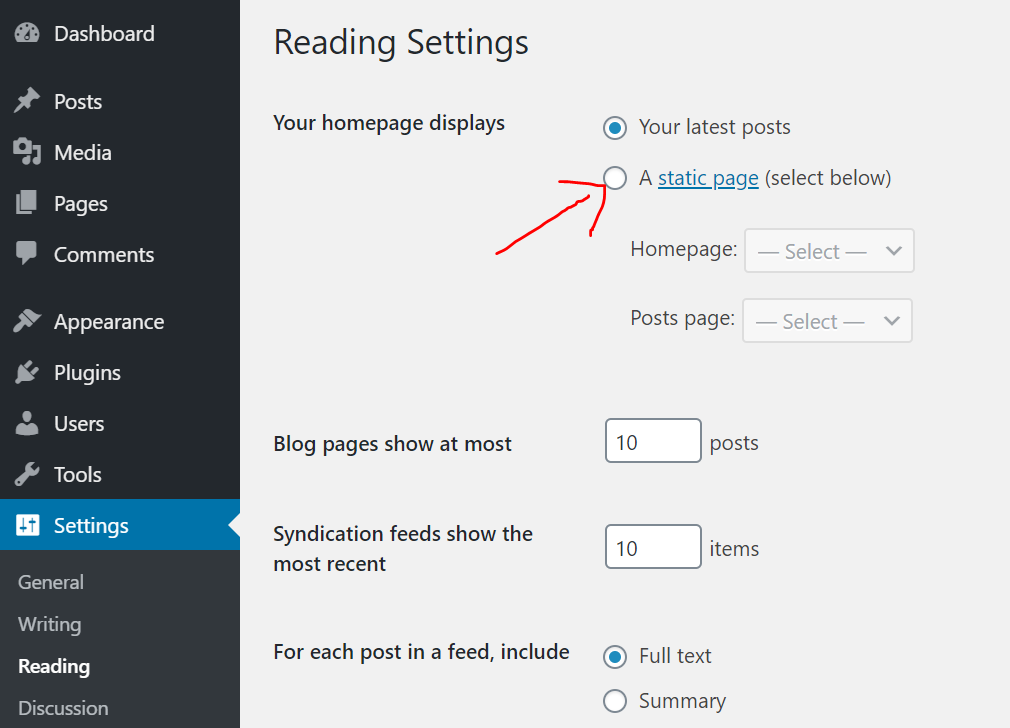
Now you have a dashing website with an awesome front page, and it is ready to be shared with the world !
5. Next Steps
Ok so we brought a Domain, then we brought a Hosting plan, and then we did the basic setup of our website. And now the next steps are :
- Create basic pages of the website, take hints from other websites. The basic pages means Home, Services, Blogs, Contact, Privacy Policy etc.
- Create a Menu and add the menu on the home page with links to these pages we created above. Its quite easy to do so, and tutorials are available online.
- Click ‘Add Post’ and add Blog Posts to your website. You can choose to display a list of your posts on the home page, and also on the Blog page. There are many plugins to do this more beautifully!
- Add useful widgets to your pages, like the post views count, Archives Manager, Social Media Plugins, Table of Contents etc.
- Add the Google Site Kit plugin to monitor Site’s performance.
- Continue updating your site with quality SEO content and share your work on social media and other channels. Read more about SEO and Ranking on Google and follow the guidelines to create an awesome and useful website.
So, These were the Basic steps to create your own website. Simply get a domain, a hosting plan, setup the basics and login to the WordPress to build your Website, it is as easy as that. Basically you can do all of this in one day!
Making a website is easy but making an impressive website is a task. It takes time, efforts, research, trials and most importantly, patience.
It is also important to keep adding quality content to the site that will make your site not only useful but will also rank higher as compared to other sites delivering similar content.
Step 4. Monetize your Website.
I know this is the most important and exciting part so I will be writing a whole new Blog only on it, but remember : Content is the King. So before you think of making revenue from your site, start by adding valuable content, and find out avenues and portals where you can showcase your work.
Some Useful Resources
Here I will give you some useful links that will help you succeed in the Online world, be it Digital Marketing, E-Commerce, Writing a Blogpost, Affiliate Marketing, Setting up your Website or more.
To buy Domain / Hosting, check out these Service Providers :
Hostripples
Host Gator
Hosting Raja
Big Rock
Dream Host
Blue Host
E Web Guru
Reseller Club
Namecheap
Build your Free Websites from :
WordPress
Wix
Website
Ukit
If you are setting up an E-Commerce store, setup these payment Gateways :
Payu
Razaor Pay
Instamojo
You can use these VPN services for a safe Browsing experience :
Pure VPN
IP Vanish
Safer VPN
SemRush is one of the biggest Website Analytics software and will give yu amazing insights that will help you plan your campaigns better and write impressive SEO articles. You can go for a 7 day trial from here.
You can sell your Digital Products like Website, PDF Guides etc here at Sellfy. Click the link to know more.
Incase you are looking for a Professional Website Developer and searching for a freelancer, Fiverr is the place. Click this link to know more.
We all know of Grammerly. It helps you write those perfect Emails, and is not just limited to Emails but can help you write complete articles without any errors. Click here to buy a Subscription of Grammerly.
We are all aware of Monday.com for its Project Management capabilities, in case you are looking to sign up for this tool, use this link.
Alright ! Write in comments if you think this blog was helpful for you to start your website. Also share your website links and lets review each other’s design and learn !
Get, Set, Web !
This is so helpful! Thank you!
xoxo
Lovely
http://mynameislovely.com